この記事は年以上前に書かれたもので、内容が古かったり、セキュリティ上の問題等の理由でリンクが解除されている可能性があります。
商用でも無料で使えるGPLライセンスの
人気CMSなので当然、納品する事も多々
あるかと思います。クライアントさんが管理
する場合と、制作者側で管理する場合があ
るかと思います。個人利用ではどうでもいい
ですが前者の場合は出来れば管理画面を
どうにかしたいところですね。
という訳で、WPの管理画面をどうにかしたい時に覚えておくと探す手間が省けて楽だなぁ、と思ってまとめた記事になります。
カスタマイズ

左上の「W」のWPロゴが目立つのでこれを変更。
お使いのテーマファイルのfunctions.phpに以下を加えます。
add_action('admin_head', 'my_custom_logo');
function my_custom_logo() {
echo '
<style type="text/css">
#header-logo { background-image: url('.get_bloginfo('template_directory').'/images/admin-logo-image.gif) !important; }
</style>
';
}
上記の例は「admin-logo-image.gif」というファイル名でロゴ画像を用意した時の例ですのでお好みで変更してください。尚、ロゴの大きさは30×30pxが望ましいです。

管理画面に入る前も「W」のロゴがあります。
個人的にはかっこよくて好きなんですが、納品するならクライアントさんの望むロゴにしてあげた方がかっこいい、というか粋ですよね。例によってfunctions.phpに追加。
function custom_login() {
echo '<link rel="stylesheet" type="text/css" href="'.get_bloginfo('template_directory').'/css/custom-login-page.css" />';
}
add_action('login_head', 'custom_login');
新たにcssを読み込ませてログイン画面のページを丸ごとオリジナルデザインにしてしまおう、という方法です。
この場合は、テーマファイルのcssというフォルダにcustom-login-page.cssを作った、という例です。
cssはお好みで。
html {background:url("login-bg.png") repeat-x scroll 0 0 ; }
h1 a { background:url("login-logo.png") 0 0 no-repeat; width:330px; height:130px; }
h1 a:hover {border: none;}
#backtoblog  { background: #383838 ;}
body.login {border-top-color:#dff4fc;}
背景とロゴ変えるだけでも結構雰囲気変わります。使用されているclassなんかはソースみて確認して下さい。

「WordPress のご利用ありがとうございます。 | ドキュメンテーション | バグ報告と提案」と、フッターにあります。
これも変えてしまいます。functions.phpに以下のコードを追加。
function custom_admin_footer() {
    echo ' お困りの際は<a href="/" title="かちびと.net">かちびと.net</a>までお気軽にお問い合わせ下さい。TEL:03-1234-5678';
}
add_filter('admin_footer_text', 'custom_admin_footer');
管理画面ですし、メーラーたち上げてもいいかもしれませんね。電話番号はダミーです。念のため。

クライアントさんがWebに詳しくない方だといろいろと不安になるものです。
WPではプラグインがアップデートされると、サイドバーにアップデート可能なプラグインの数が表示される親切機能がありますが、クライアントさんにとっては不安になるだけ。数値を非表示にするのも一つの手です。
add_action('admin_menu', 'remove_counts');
function remove_counts(){
global $menu,$submenu;
$menu[65][0] = 'プラグイン';
$submenu['index.php'][10][0] = 'Updates';
}
functions.phpに上記コードを加えればOKです。

管理画面なのでセキュリティ的にもhttps:にして保護しておくといいかもですよね。
クライアントさんへの納品にもオススメ。wp-config.phpに以下を追加します。
define('FORCE_SSL_ADMIN', true);
当然ですが、SSLが使えるサーバーである事が条件です。

WordPressのサイドバーはCMSの中でも特に使いやすいし、分かりやすいと個人的に思っているのですが(贔屓です)、クライアントさんにとってはよく分からないものだし、逆に欲しい項目があるかもしれません。
そんな時はメニュー項目を追加してあげましょう。
<?php
function test_menu_page() {
    $siteurl = get_option( 'siteurl' );
?>
<div class="wrap">
    <h2>ヘルプです</h2>
    <p>コンテンツ</p>
   </div>
<?php
}
function test_admin_menu() {
    add_menu_page( 'ヘルプ', 'ヘルプ', 'read',
		   __FILE__, 'test_menu_page' );
}
add_action( 'admin_menu', 'test_admin_menu' );
?>
add_menu_page( ‘ヘルプ’, ‘ヘルプ’の部分が追加するメニュー項目になります。新しい項目のコンテンツはdiv class=”wrap”で囲っている部分です。お好きなコンテンツを加えてみてください。
余談ですが、この方法で管理画面マニュアルのプラグインも作成しています。

WPの管理画面、素敵なデザインなんですが、自分でいろいろ変えたい。jsを使ってグリグリ動かしたい、という方もいるかもしれませんね。
そんな時はcssファイル(またはjs)を読み込ませてしまいます。
function wp_custom_admin_css() {
	echo "\n" . '<link rel="stylesheet" type="text/css" href="' .get_bloginfo('template_directory'). '/css/custom-admin-css.css' . '" />' . "\n";
}
add_action('admin_head', 'wp_custom_admin_css', 100);
functions.phpにコードを加えます。上記は、テーマファイルのcssフォルダにあるcustom-admin-css.cssを読み込ませた例です。同じ方法でjsも追加してください。

プラグイン化して配布させて頂いてますが、ハックもご紹介。記事ごとにcssやjsを加える為のボックスを追加します。
少し前にコリスさんがプラグインを紹介されてましたが、こちらはカスタムフィールドが嫌な方向けですかね。
function add_css_to_post_custom_css_input() {
    global $post;
    echo '<input type="hidden" name="custom_css_noncename" id="custom_css_noncename" value="'.wp_create_nonce('custom-css').'" />';
    echo '<textarea name="custom_css" id="custom_css" rows="5" cols="30" style="width:100%;">'.get_post_meta($post->ID,'_custom_css',true).'</textarea>';
}

function add_css_to_post_custom_css_hooks() {
    add_meta_box('custom_css', 'add CSS', 'add_css_to_post_custom_css_input', 'post', 'normal', 'high');
    add_meta_box('custom_css', 'add CSS', 'add_css_to_post_custom_css_input', 'page', 'normal', 'high');
}

function add_css_to_post_save_custom_css($post_id) {
    if (!wp_verify_nonce($_POST['custom_css_noncename'], 'custom-css')) {
	return $post_id;
    }
    if (defined('DOING_AUTOSAVE') && DOING_AUTOSAVE) {
	return $post_id;
    }
    $custom_css = $_POST['custom_css'];
    update_post_meta($post_id, '_custom_css', $custom_css);
}

function add_css_to_post_insert_custom_css() {
    if (is_page() || is_single()) {
	while (have_posts()) {
	    the_post();
	    echo '<style type="text/css">'.get_post_meta(get_the_ID(), '_custom_css', true).'</style>';
	}
	rewind_posts();
    }
}

function add_css_to_post_init() {
    add_action('admin_menu', 'add_css_to_post_custom_css_hooks');
    add_action('save_post', 'add_css_to_post_save_custom_css');
    add_action('wp_head','add_css_to_post_insert_custom_css');
}

add_action('init', 'add_css_to_post_init');


function add_js_to_post_custom_js_input() {
    global $post;
    echo '<input type="hidden" name="custom_js_noncename" id="custom_js_noncename" value="'.wp_create_nonce('custom-js').'" />';
    echo '<textarea name="custom_js" id="custom_css" rows="5" cols="30" style="width:100%;">'.get_post_meta($post->ID,'_custom_js',true).'</textarea>';
}

function add_js_to_post_custom_js_hooks() {
    add_meta_box('custom_js', 'add JS', 'add_js_to_post_custom_js_input', 'post', 'normal', 'high');
    add_meta_box('custom_js', 'add JS', 'add_js_to_post_custom_js_input', 'page', 'normal', 'high');
}

function add_js_to_post_save_custom_js($post_id) {
    if (!wp_verify_nonce($_POST['custom_js_noncename'], 'custom-js')) {
	return $post_id;
    }
    if (defined('DOING_AUTOSAVE') && DOING_AUTOSAVE) {
	return $post_id;
    }
    $custom_js = $_POST['custom_js'];
    update_post_meta($post_id, '_custom_js', $custom_js);
}

function add_js_to_post_insert_custom_js() {
    if (is_page() || is_single()) {
	while (have_posts()) {
	    the_post();
	    echo '<script type="text/javascript">'.get_post_meta(get_the_ID(), '_custom_js', true).'</script>';
	}
	rewind_posts();
    }
}

function add_js_to_post_init() {
    add_action('admin_menu', 'add_js_to_post_custom_js_hooks');
    add_action('save_post', 'add_js_to_post_save_custom_js');
    add_action('wp_head','add_js_to_post_insert_custom_js');
}

add_action('init', 'add_js_to_post_init');
functions.phpに加えれば投稿ページにボックスが追加されます。ちょっと長いのでプラグイン化してあげても良さそうですね。
このハックの欠点は、cssやjsを書いてなくても白紙のstyle type=”text/css”が加わってしまう事ですかね。条件分岐で済む話ですが別に支障ないのでそのままです・・・気持ち悪いようでしたらご自身で書いてください。

あんまり使わないでしょうが、折角覚えたのでご紹介。
プロフィールの項目、AIMとか微妙ですよね。なかなか使われないのは項目の内容にも問題がある気がします。そこで、プロフィールで設定できる項目を自由に増やしたり減らしたりしましょう、というもの。
functions.phpに以下のようにコードを加えます。
function my_new_contactmethods( $contactmethods ) {

$contactmethods['twitter'] = 'Twitter';
$contactmethods['facebook'] = 'Facebook';
$contactmethods['hatena'] = 'はてな';
$contactmethods['mixi'] = 'mixi';
$contactmethods['Flickr'] = 'Flickr';
$contactmethods['YouTube'] = 'YouTube';
$contactmethods['Tumblr'] = 'Tumblr';

return $contactmethods;
}
add_filter('user_contactmethods','my_new_contactmethods',10,1);
沢山増やしてみました。表示させる時は
<?php the_author_meta('twitter'); ?>
こんな感じで。逆に減らしたい時は、
unset($contactmethods['aim']);
と、書いてあげればOKです。
管理画面をあれこれするプラグイン
以下からはプラグインです。クライアントに頼まれやすい機能を補えるWordPressプラグインいろいろという記事と結構かぶります。
サイドバーのタイトルテキストを変更する

管理画面のサイドバーのタイトルテキストを変更できます。これが地味に助かるんですよね。
Admin Menu Editor
投稿エディタに好きな項目を増やす

投稿エディタに好きな項目を増やせます。マークアップした定型文なんかを加えてあげるとか、そんな感じで重宝します。
管理画面やログイン画面のデザインを変える

先ほどの管理画面ハックをプラグインで出来ます。手軽っちゃ手軽です。
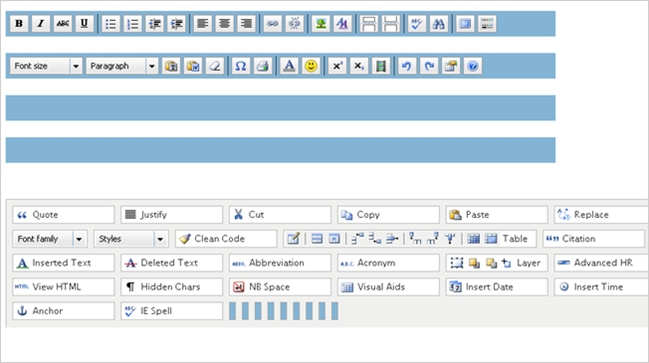
エディタの機能を強化する

同じく、エディタ関連。エディタを強化してくれます。
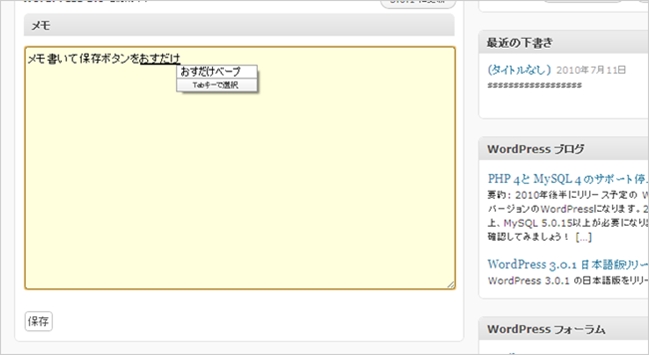
ダッシュボードにメモ帳を加える

管理画面TOPページにメモ帳を加えます。結構便利ですよ。
サイドバーを右側に配置する

サイドバーは右じゃないと見にくいんだ、という方はこちらをご利用下さい。管理画面のサイドメニューを右側にしてくれます。
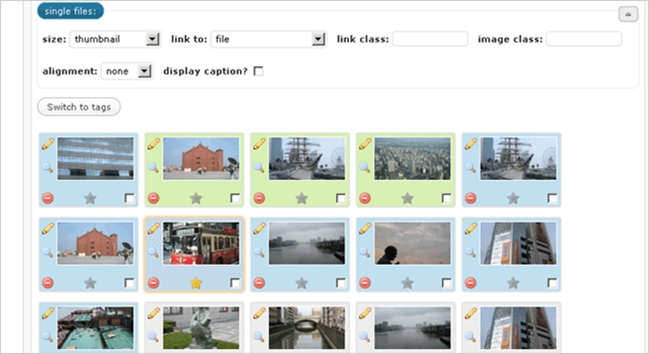
画像を一括挿入する

画像の一括アップロードは出来るのに記事への一括挿入はできない、という謎の仕様のWPですが、その一括挿入を可能にするプラグインです。2つあるのでお好みで。
上部プルダウンメニューの項目を増やす

あまり使わない部分なのでアレですが、上部プルダウンメニューに項目を追加できるプラグインです。
以上、管理画面のカスタマイズに役立ちそうなハックやプラグインのご紹介でした。プラグインとハックがかぶったりしますが、ケースバイケースで使い分けてあげるといいですね。functions.phpもゴチャゴチャさせたくないですし。
