この記事は年以上前に書かれたもので、内容が古かったり、セキュリティ上の問題等の理由でリンクが解除されている可能性があります。
cssの小技的なテクニックが便利なので好きなん
ですが、cssそのものが嫌いで覚えられないので
カンペ的な記事を作ることにしました。便利な小技
は沢山あるんですが、特に自分が良く使いそうな
Tipsをメモします。既に出回っている情報ばかりで
特に目新しい手法はありませんので何も期待でき
ないです。
というわけで特にテーマも一貫性も無くて、ただ便利ってだけです。推奨されない方法もあるかもしれませんが、僕は細かいこと気にしませんのでそんな感じです。
内容も既出なのでお詳しい方にはお役に立てないですが、僕の個人的なメモなので適当に流して頂けると幸いです。
floatで並べたリストのセンタリング

Sample01
コード
.centered {
  position: relative;
  overflow: hidden;
}

.centered ul {
  position: relative;
  left: 50%;
  float: left;
}

.centered ul li {
  position: relative;
  left: -50%;
  float: left;
}
これいいアイデアですね
via:hail2u.net
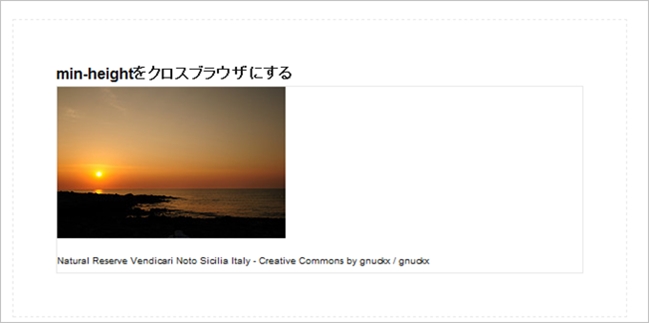
min-heightをクロスブラウザにする
Sample02
コード
.foo {
min-height:300px;
_height: auto !important;
_height: 300px;
}
IE6での!imporantのバグを使ったテクニック。どこのサンプルコードもしてないですけど個人的になんとなくハックしておきたいです・・
via:MAKE
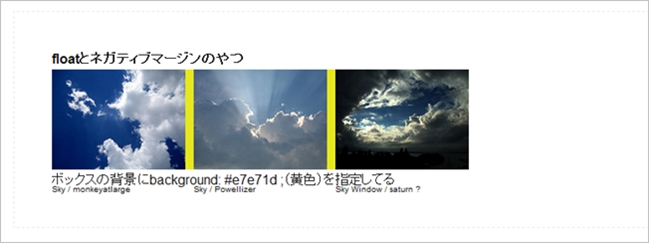
floatとネガティブマージンのやつ
Sample03
コード
div#photo {
  width: 500px; /* 全体の横幅 */
  height: 120px;
  overflow: hidden;
}
div#photo ul {
  width: 510px;
  height: 120px;
  margin-right: -10px; /* ここがポイント! */
  list-style-type: none;
}
div#photo li {
  float: left; /* floatで段組み */
  width: 160px;
  height: 120px;
  margin-right: 10px; /* 写真間の余白 */
}
結構定番ですかね・・ネガティブマージンでボックス内に余白を作らない段組を作る。
via:バシャログ。
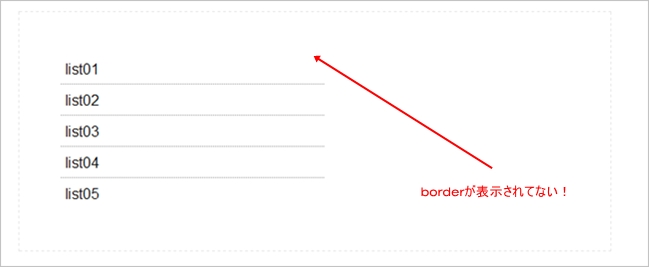
liに付けたborder-topの最初だけ消す
Sample04
コード
ul {
    _zoom: 1;
    overflow: hidden;
    }
    ul li {
    margin-top: -1px;
    padding: 5px;
    border-top: 1px solid #333;
    }
:first-childを使っても同じことが実現できます。
cssのみでツールチップ

Sample05
コード
.toolTip{
    position: relative;
}
.toolTip span{
  display: block;
  border: solid 2px #999;
  background-color: #eee;
  color: #666;
  text-decoration: none;
  position: absolute;
  top: 20px;
  left: 10px;
  padding: 5px;
  visibility: hidden;
  width: 150px;
}

a.toolTip:hover,a.toolTip:hover span{
  visibility: visible;
  z-index: 100;
}
<p>これは<a href="#" class="toolTip">ツールチップのデモ<span>( ゚∀゚)o彡゜ツールチップ!ツールチップ!</span></a>です。</p>
js使う必要ない状況ならこれで十分
via:CSS-EBLOG
cssでツールチップ・その2

Sample06
コード
.tooltip {
  border-bottom: 1px dotted #000000;
  color: #000000;
  outline: none;
  cursor: help;
  text-decoration: none;
  position: relative;
}
.tooltip span {
  margin-left: -999em;
  position: absolute;
}
.tooltip:hover span {
  border-radius: 5px 5px;
  -moz-border-radius: 5px;
  -webkit-border-radius: 5px;
  box-shadow: 5px 5px 5px rgba(0, 0, 0, 0.1);
  -webkit-box-shadow: 5px 5px rgba(0, 0, 0, 0.1);
  -moz-box-shadow: 5px 5px rgba(0, 0, 0, 0.1);
  font-family: Calibri, Tahoma, Geneva, sans-serif;
  position: absolute;
  left: 1em;
  top: 2em;
  z-index: 99;
  margin-left: 0;
  width: 250px;
}
.tooltip:hover img {
  border: 0; margin: -10px 0 0 -55px;
  float: left; position: absolute;
}
.tooltip:hover em {
  font-family: Candara, Tahoma, Geneva, sans-serif;
  font-size: 1.2em;
  font-weight: bold;
  display: block;
  padding: 0.2em 0 0.6em 0;
}
		.classic { padding: 0.8em 1em; }
		.custom { padding: 0.5em 0.8em 0.8em 2em; }
		* html a:hover { background: transparent; }
		.classic {background: #FFFFAA; border: 1px solid #FFAD33; }
		.critical { background: #FFCCAA; border: 1px solid #FF3334;	}
		.help { background: #9FDAEE; border: 1px solid #2BB0D7;	}
		.info { background: #abd0bc; border: 1px solid #2BB0D7;	}
		.warning { background: #FFFFAA; border: 1px solid #FFAD33; }
なかなか良い感じでは。IE6だと出ないっぽいですね・・
via:sixrevisions
画像無しで吹き出し

Sample07
コード
blockquote#two {
  width: 450px;
  background: #efffdd;
  padding: 25px;
  position: relative;
}

blockquote#two .arrow {
  width: 0;
  height: 0;
  line-height: 0;
  border-bottom: 25px solid #efffdd;
  border-right: 50px solid white;
  position: absolute;
  top: -24px;
  left: 20px;
}
このブログでは擬似クラスを使って実装してます。IE6はちょい調整しないとですかね
via:Nettuts+
テーブルのセル内で改行させない

Sample08
コード
th { white-space:nowrap; }
widthで頑張らなくても改行を禁止しちゃえばいいんですね
URLがボックスからはみ出るのを防ぐ

Sample09
コード
pre {
  white-space: pre;           /* CSS 2.0 */
  white-space: pre-wrap;      /* CSS 2.1 */
  white-space: pre-line;      /* CSS 3.0 */
  white-space: -pre-wrap;     /* Opera 4-6 */
  white-space: -o-pre-wrap;   /* Opera 7 */
  white-space: -moz-pre-wrap; /* Mozilla */
  white-space: -hp-pre-wrap;  /* HP Printers */
  word-wrap: break-word;      /* IE 5+ */
}
印刷用もあるなんて知りませんでしたw
via:PERISHABLE PRESS
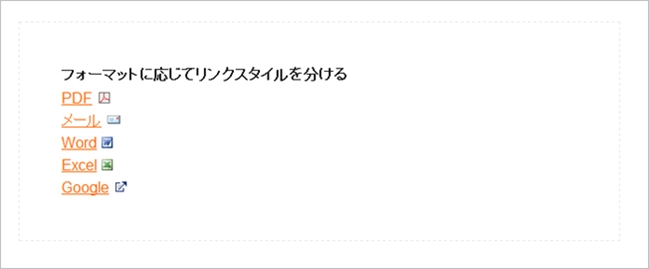
フォーマットに応じてリンクスタイルを分ける
Sample10
コード
/* 外部サイト */
a[href^="http://"]{
  padding-right: 20px;
  background: url(icon_external.gif) no-repeat center right;
}
/* メール */
a[href^="mailto:"]{
  padding-right: 20px;
  background: url(icon_mailto.gif) no-repeat center right;
}
/* PDF */
a[href$=".pdf"]{
  padding-right: 20px;
  background: url(icon_pdf.gif) no-repeat center right;
}
/*Word*/
a[href$='.doc'] {
  padding-right: 18px;
  background: transparent url(icon_doc.gif) no-repeat center right;
}
/*Exile*/
a[href$='.xls'] {
  padding-right: 18px;
  background: transparent url(icon_xls.gif) no-repeat center right;
}
もっと応用できそうなんですけどね、これ・・
via:1WD.CO
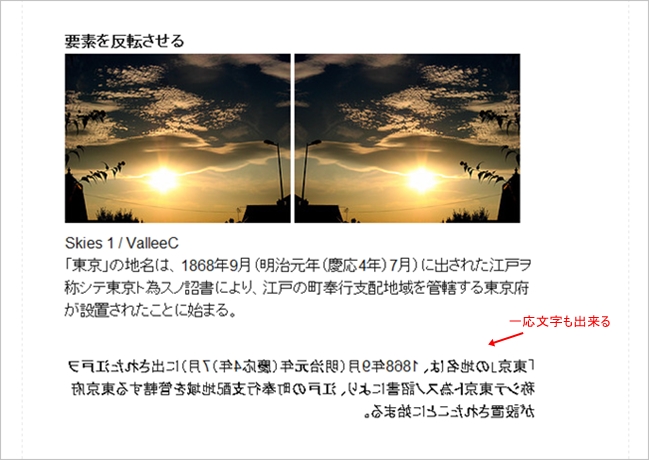
要素を反転させる
Sample11
コード
img.flip {
  -moz-transform: scaleX(-1);
  -o-transform: scaleX(-1);
  -webkit-transform: scaleX(-1);
  transform: scaleX(-1);
  filter: FlipH;
  -ms-filter: "FlipH";
}
IEはfilter使う。上下反転の場合はscaleXをscaleY、FlipHをFlipVにすればいい。
via:Webデザインレシピ
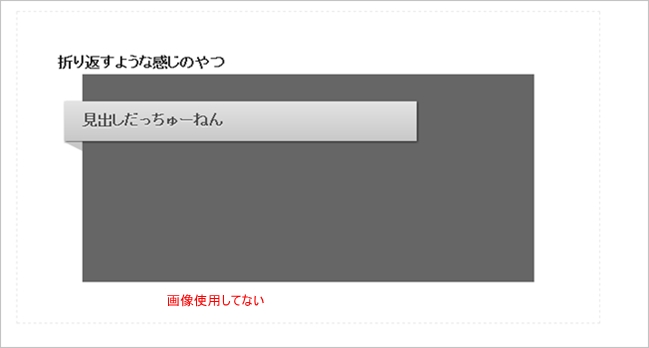
折り返すような感じのやつ
Sample12
コード
h1 {
  background: #e3e3e3;
  background: -moz-linear-gradient(top, #e3e3e3, #c8c8c8);
  background: -webkit-gradient(linear, left top, left bottom, from(#e3e3e3), to(#c8c8c8));
  padding: 10px 20px;
  margin-left: -20px;
  margin-top: 0;
  position: relative;
  width: 70%;

  -moz-box-shadow: 1px 1px 3px #292929;
  -webkit-box-shadow: 1px 1px 3px #292929;
  box-shadow: 1px 1px 3px #292929;

  color: #454545;
  text-shadow: 0 1px 0 white;
}

.arrow {
  width: 0; height: 0;
  line-height: 0;
  border-left: 20px solid transparent;
  border-top: 10px solid #c8c8c8;
  top: 104%;
  left: 0;
  position: absolute;
}
<!DOCTYPE html>
<html lang="en">
<head>
	<meta charset="utf-8">
	<title>CSS Shapes</title>
	<!--[if IE]>
		<style>
			.arrow { top: 100%; }
		</style>
	<![endif]-->
</head>
<body>
	 <div id="container">
		<h1> My Heading <span class="arrow"></span> </h1>
	</div>
</body>
</html>
IE7でもそこそこイケる
via:Nettuts+
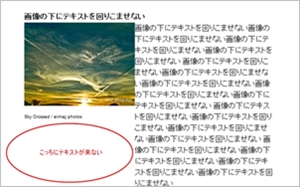
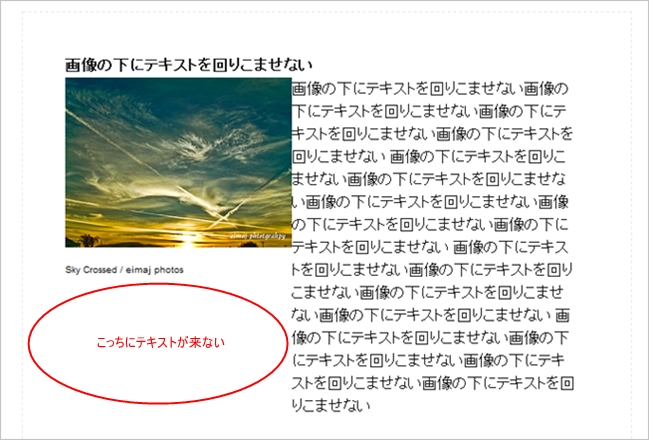
画像の下にテキストを回りこませない
Sample13
コード
.thumb{float:left;}
.text{overflow:auto;zoom:1;}
<p class="thumb"><img src="/any-size-image.jpg" alt="横幅不定の画像" /></p>
<p class="text">てきすとてきすとてきすとてきすとてきすと</p>
これ素敵です
via:neotagの雑文
floatさせた要素に見出しを食い込ませない
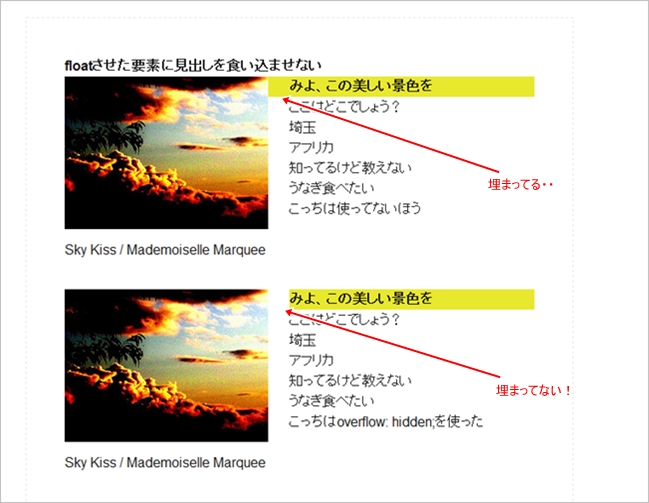
Sample14
コード
 ul,
 h3 {
  _zoom: 1;
  overflow: hidden;
}
よく困るやつ。
via:CSS HappyLife
IEのバージョン別にスタイルを変える

Sample15
コード
<!--[if lt IE 7 ]> <html class="ie6"> <![endif]-->
<!--[if IE 7 ]> <html class="ie7"> <![endif]-->
<!--[if IE 8 ]> <html class="ie8"> <![endif]-->
<!--[if IE 9 ]> <html class="ie9"> <![endif]-->
<!--[if (gt IE 9)|!(IE)]><!--> <html> <!--<![endif]-->
cssは以下のようにすればいい。HTML5では定番になってますね。
.box {
  color: #fff;
  padding: 5px 20px;
  background: gray;
}
.ie8 .box {
  background: pink;
}
.ie7 .box {
  background: green;
}
.ie6 .box {
  background: blue;
}
via:Web Design Wall
文末をそろえる
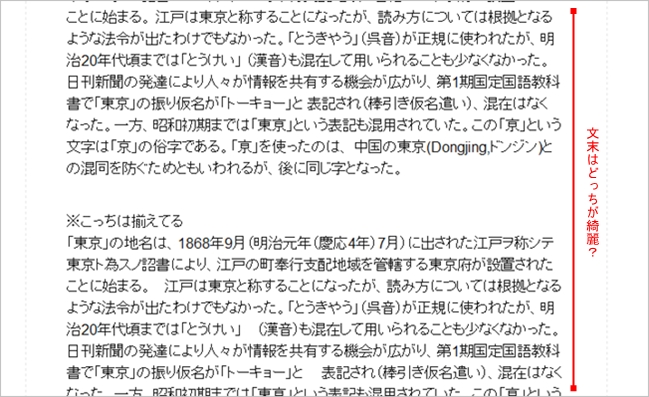
Sample16
コード
p{
  text-align: justify;
  text-justify: inter-ideograph;
}
まぁあんまり使わないでしょうけど、パッと見、綺麗に見せることが出来るので。
最初の文字だけ大きくする
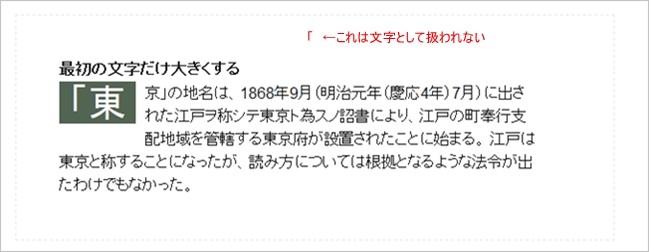
Sample17
コード
p:first-letter{
  font-size: 40px;
  background-color: #526452;
  color: #fff;
  float: left;
  margin-right: 10px;
  margin-bottom: 10px;
  padding: 10px;
}
マガジンサイトかなんかでよく使われてますね。IE6は非対応、IE7は「を文字として認識して大きくします。
注意書きとかで便利なやつ

Sample18
コード
.attention_txt  {
  margin-left: 1em;
  text-indent: -1em;
}
1文字分ずらす。IE6だと※が消える
以上、cssの小技まとめでした。css嫌いだし、ちゃんと勉強する気もあまり起きないのでこうしてカンペ作ってズルしていきたい。
それはそうとExcelをExileに変えるトラップに誰か気がついてくれたでしょうか。
